

Build a GraphQL Server using Deno(From Scratch) | Deno Advanced
GraphQL is already known for its good parts. GraphQL helps to build super scalable APIs. It reduces coupling between code and data provider. Deno is..


Introduction
GraphQL is already known for its good parts. GraphQL helps to build super scalable APIs. It reduces coupling between code and data provider. Deno is one of the fastest-growing frameworks/languages to build APIs. However, Deno community still new. So there is a very little framework in the Deno community. Some of them are in a very early stage of development.
In this article, I will explain how you can easily integrate the GraphQL nodejs module with Deno lang. This is a very basic implementation. However, Still, there is a lot of scope for improvements. This is not the end. This is just beginning.
Prerequisite
- Deno installed on system
- Basic knowledge of Deno read more..
- Basic understanding of routing read more..
- Basic knowledge of GraphQL read more..
Steps
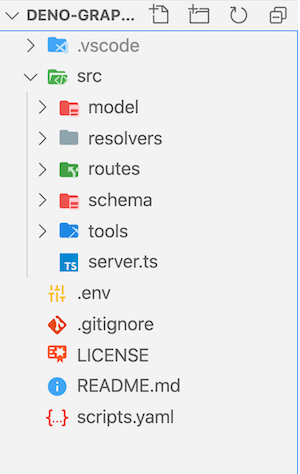
1. Basic project directory setup
First, create folders and file as described below.
mkdir  src
mkdir  src/model src/resolvers src/routes src/schema
touch README.md scripts.yaml src/server.ts

## Optional
mkdir .vscode
touch .vscode/settings.json
Here, src will be the directory containing all code. model is to hold all the database/models. We will create all resolvers in resolvers directory. Similarly, routes and schema to keep routes and schemas respectively. src/server.ts will be an entry for the server to start with.
2. Velociraptor as script runner
Deno does not have a task runner like npm. However, in Deno community, There are lots of modules we can use. I like Velociraptor. It is easy to start with an easy to integrate.
## You can check the current version.
deno install -qA -n vr https://deno.land/x/velociraptor@1.0.0-beta.16/cli.tscl
Once you install velociraptor using deno, It will be available as executable as vr. You can try to validate using vr --version. It will print the current version of the velociraptor.
Let's add basic scripts in src/server.ts
allow:
  - net
  - read
  - env

scripts:
  start:
    cmd: deno run src/server.ts
  test: "echo 'No Test Found'"
  build: deno compile --unstable --allow-read --allow-net src/server.ts
Tips: velociraptor supports JSON, yaml and many more formats. I like yaml version cool so I am using it.
Explained:
- allow to allow net, read, and env permission to Deno executable
- scripts to add command.
Let's add basic hello world sever in server.ts
3. Basic server using Oak
We are going to use Oak to build our backend server. It is the most stable and community supported module out there.
// src/server.ts

import { Application } from "https://deno.land/x/oak/mod.ts";
import { config } from "https://deno.land/x/dotenv/mod.ts";
import { Logger, LoggerOptions } from "https://deno.land/x/deno_util/logger.ts";

const initialOptions = { level: 0, format: "%s", newLine: true };
const logger = new Logger(initialOptions as LoggerOptions);
const { PORT = 4000 } = config({ safe: true });

const app = new Application();
app.use((cxt) => {
  cxt.response.body = "Hello GraphQL";
});

logger.line(`🚀 Server is running on http://localhost:${PORT}/graphql`);
await app.listen({ port: Number(PORT) });
Run:
vr start
Output:
==========================================================
||      🚀 Server is running on http://localhost:4000/graphql
==========================================================
Info:
You may get a pop-up to allow network access to Deno when you try to run the server.
Explained:
- Import oak module to create an Application.
- dotevn to allow create environmental variable.
- deno_util to create a basic logger.
- app.use to create basic route. Currently, It will respond Hello GraphQL to every request.
4. Basic mock database
Since the purpose of this tutorial is not to teach you how to bind database and all. So we will mock the database as close as a real app.
Create a database.ts file touch src/model/database.ts
// src/model/database.ts

const users = [
  {
    _id: "6027d46771b8a91a27bc9e13",
    index: 0,
    guid: "b0b80419-58a5-42ac-b488-b7c87a66f9f7",
    isActive: true,
    balance: "$3,095.41",
    picture: "http://placehold.it/32x32",
    age: 26,
    name: "Hickman Beach",
    gender: "male",
    email: "hickmanbeach@vidto.com",
    phone: "+1 (980) 401-2407",
    address: "489 Canda Avenue, Buxton, Tennessee, 252",
    about: "lorem..",
    registered: "2020-11-16T10:40:17 -08:00",
    friends: [
      {
        id: 0,
        name: "Franklin Gentry",
      },
    ],
  },
];

export interface Friend {
  id: number;
  name: string;
}

export interface User {
  _id: string;
  index: number;
  guid: string;
  isActive: boolean;
  balance: string;
  picture: string;
  age: number;
  name: string;
  gender: string;
  email: string;
  phone: string;
  address: string;
  about: string;
  registered: string;
  friends: Friend[];
}

export const getUsers = async (predicate?: (user: User) => boolean) => {
  if (typeof predicate === "function") return users.filter(predicate);
  return users;
};
Note: You can get the whole file in github repo.
Explained:
A very basic mock database with getUsers method, which returns users based on a predicate. If there is no predicate, It will return all users else apply a filter using a predicate.
5. Create a /graphql endpoint to handle graphql POST request
GraphQL specs support POST to query server. We will use the same. To create a scalable routing. We will create our route in the routes folder and append it in Oak Application using the callback function.
Create files touch src/routes/index.ts src/routes/graphql.ts
Let's create gqlrouter
// src/routes/graphql.ts

import { Router } from "https://deno.land/x/oak/mod.ts";

const gqlrouter = new Router();
gqlrouter
  .get("/graphql", (context) => {
    context.response.body = "Please use Post to Query";
  })
  .post("/graphql", async (context) => {
    const result = context.request.body();
    if (result.type === "json") {
      const { query, variables = {} } = await result.value;
      if (query) {
        context.response.body = { query, variables };
      } else {
        context.response.body = { message: "Invalid Query" };
        context.response.status = 400;
      }
    }
  });

export default gqlrouter;
Let's update index.ts to append routes to Server.
// src/routes/index.ts

import {
  Application,
  Middleware,
  Router,
} from "https://deno.land/x/oak/mod.ts";
import { requestTraceMiddleware } from "https://deno.land/x/oak_middlewares/mod.ts";
import gqlrouter from "./graphql.ts";
const baseRoute = new Router();

baseRoute.get("/", (context) => {
  context.response.body = `<b>Please use <a href="/graphql">/graphql</a> to query</b>`;
  context.response.headers.append("Content-Type", "text/html; charset=UTF-8");
});

export default function init(app: Application) {
  app.use(
    requestTraceMiddleware<Middleware>({ type: "combined" })
  );
  app.use(baseRoute.routes());
  app.use(gqlrouter.routes());
  app.use(gqlrouter.allowedMethods());
}
Explained:
- graphql.ts, We have just created an instance of Oak route. It can accept a get request and a post request at endpoint "/graphql".
- All the GraphQL request contains query and variables as data payload.
- Currently, return
query and variablesin return response. - index.ts to combine routes and apply some other middleware to Oak Application.
Let's update our server.ts
//src/server.ts

/// Rest of the code...
import init from "./routes/index.ts";

const app = new Application();
init(app);

/// Rest of the code...
Run:
vr run start
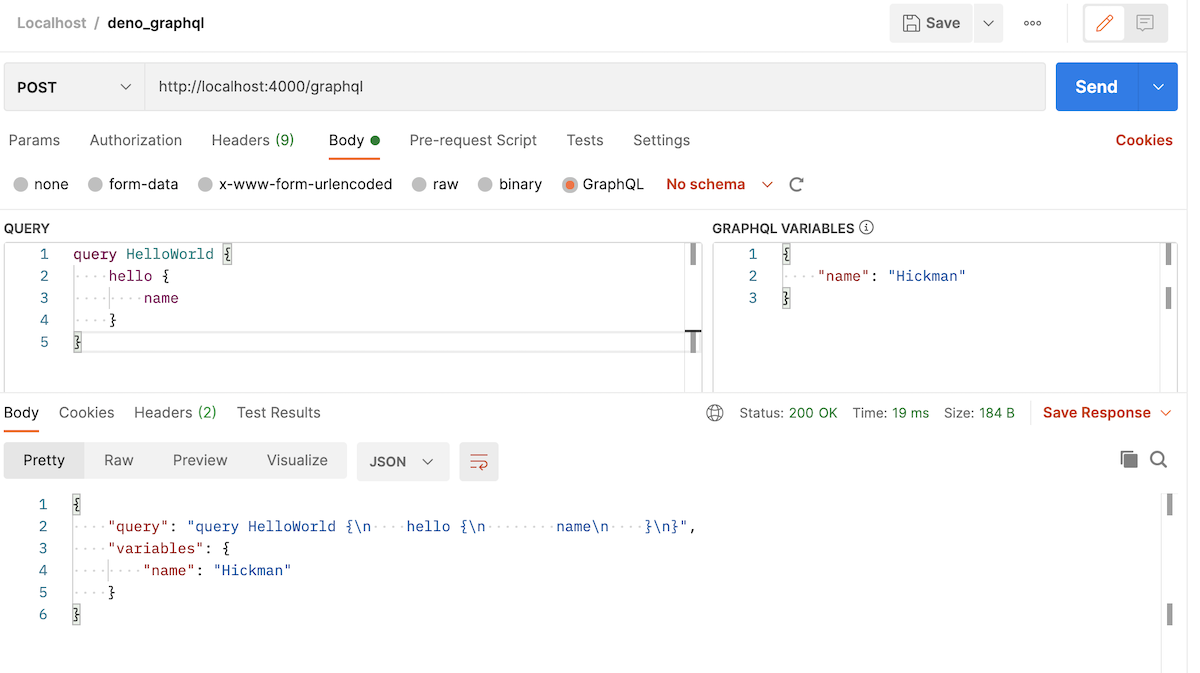
Query using Postman:
Query using CURL:
curl --location --request POST 'http://localhost:4000/graphql' \
--header 'Content-Type: application/json' \
--data-raw '{"query":"query HelloWorld {\n    hello {\n        name\n    }\n}","variables":{"name":"Hickman"}}'
Output:
{
  "query": "query HelloWorld {\n    hello {\n        name\n    }\n}",
  "variables": {
    "name": "Hickman"
  }
}
6. Create GraphQL schema and resolver
GraphQL Executor requires schema and resolver to execute the query. For that, we need to create schema and resolver. Schema can be written in String and compile to code using buildSchema helper method. Resolvers are basic functions, will be called by graphql executor, and act on the query.
To use GraphQL Executor we have to install/use graphql module from cdn.skypack.dev
//src/schema/user.ts

const UserSchema = `
  type Friends {
    id: Int
    name: String
  }

  type User {
    _id: String
    index: Int
    guid: String
    isActive: Boolean
    balance: String
    picture: String
    age: Int
    name: String
    gender: String
    email: String
    phone: String
    address: String
    about: String
    registered: String
    friends: [Friends]
  }
`;
export default UserSchema;
//src/schema/index.ts

import { buildSchema } from "https://cdn.skypack.dev/graphql";
import UserSchema from "./user.ts";
const base = `
type Query {
  hello: String
  users(name: String): [User]
}
`;
export default buildSchema([base, UserSchema].join("\n"), {});
Explained:
- You can use json-to-graphql, To generate graphql schema
- buildSchema compile and validate schema to generate code in runtime.
Note: Currently, graphql does not support multi-file schema(Query). So we have to write all queries in index.ts. Hopefully, In future, we can use graphql tools.
Let's create resolvers for users and hello query
// src/resolvers/hello_world.ts

const HelloResolver = {
  Query: {
    hello: async (_: any, { name }: any = {}, context: any, z: any) => {
      return "Hello world!";
    },
  },
};
export default HelloResolver;
// src/resolvers/user.ts

import { getUsers } from "../model/database.ts";

const UserResolver = {
  Query: {
    users: async (d: any = {}, context: any) => {
      return getUsers(d.name ? (u: any) => u.name.includes(d.name) : undefined);
    },
  },
};
export default UserResolver;
//  src/resolvers/index.ts

import HelloResolver from "./hello_world.ts";
import UserResolver from "./user.ts";

const resolvers = Object.assign(
  {},
  ...[HelloResolver, UserResolver].map((x) => x.Query)
);
export default resolvers;
Explained:
- user.ts and hello.ts contains an object with Query in it. The query has the function same name as it is defined in GraphQL Schema.
- index.ts accumulate all the resolvers.
7. Route to handle Query and execute
Now we have created schema and resolver function. We can handle GraphQL requests and responses to the query. For that, we need to update our src/routes/graphql.ts.
// src/routes/graphql.ts

import { Router } from "https://deno.land/x/oak/mod.ts";
import { graphql } from "https://cdn.skypack.dev/graphql";
import schema from "../schema/index.ts";
import resolvers from "../resolvers/index.ts";

const gqlrouter = new Router();
gqlrouter
  .get("/graphql", (context) => {
    context.response.body = "Please use Post to Query";
  })
  .post("/graphql", async (context) => {
    const result = context.request.body();
    if (result.type === "json") {
      const { query, variables = {} } = await result.value;
      if (query) {
        const data = await (graphql as any)(
          schema,
          query,
          resolvers,
          {
            request: context.request,
            response: context.response,
          },
          variables || {}
        );
        if (data.errors) {
          context.response.body = data;
          context.response.status = 400;
        } else {
          context.response.body = data;
        }
      } else {
        context.response.body = { message: "Invalid Query" };
        context.response.status = 400;
      }
    }
  });

export default gqlrouter;
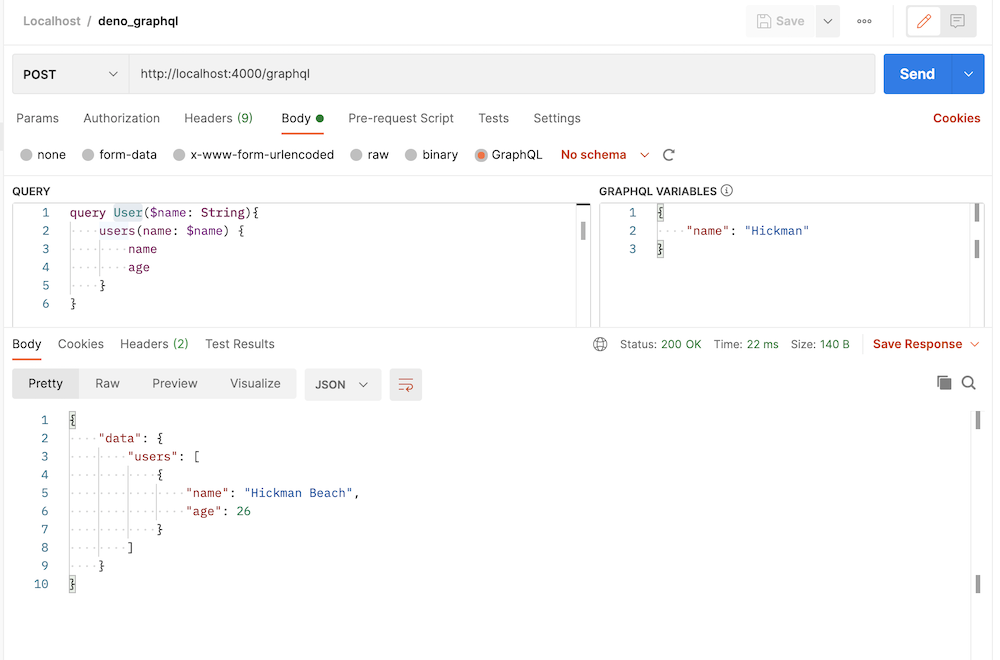
Query using Postman:
Query using CURL:
curl --location --request POST 'http://localhost:4000/graphql' \
--header 'Content-Type: application/json' \
--data-raw '{"query":"query User($name: String){\n    users(name: $name) {\n        name\n        age\n    }\n}","variables":{"name":"Hickman"}}'
Output:
{
  "data": {
    "users": [
      {
        "name": "Hickman Beach",
        "age": 26
      }
    ]
  }
}
Congrats, Your GraphQL Server is ready to serve(🚀) the request.
Limitations
As I mentioned earlier, Deno is still very new and the community is also very new. The above app has a lot of limitations. However, We shouldn't stop exploring it. Some of the limitations are highlighted below.
- Support for multiple Query/Aliases
- Merge Schema from multiple files
- Conflict in resolvers
- Validations and Proper Error Handling
Source Code
I hope you like this tutorial. let me know your feedback in the comment. Please support(🙏🙏) by subscribing and clapping on https://deepak-v.medium.com/.